
Wednesday, March 31, 2010

pretty easter eggs

Very pretty and I have seen the old book pages mod podged on lots of eggs this Easter. I love the vintage effect. Check them out at inspire co.
Tuesday, March 30, 2010
chocolate birds nest
 Don't these little nests bring back memories of childhood. I know I made these on many a Easter. I was especially happy with this recipe because it had no peanut butter (daughter is allergic). Check them out at Mustard Seeds.
egg design book
 This is so fun and could help in keeping my kids quiet during those moments where they need to be and can't seem to :) Check it out at Chez Beeper Baby.
Monday, March 29, 2010
paper lollies

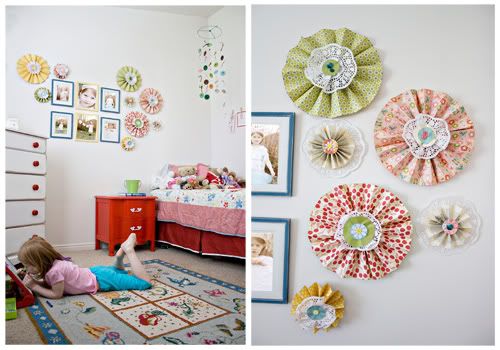
This weekend we were busy adding a little more color and whimsy to my little girls room. The final result were these super cute, super easy and super inexpensive paper lollies. I received my inspiartion from a segment that I saw on Studio 5. Although they do not have the segment linked to their website yet, you can follow this tutorial from Blue Cricket Designs to get the same effect. I embellished my lollies with a little Dollar Store doily, leftover paper scraps and buttons. I attached them to the wall with some wall stickies from the Dollar Store.


Thursday, March 25, 2010

Wednesday, March 24, 2010
birdhouse wall
 I just about died when I saw this birdhouse wall. What a great statement piece and hello my little girls room already has a bird theme in it...this would be perfect. Check out a tutorial at Caitlin Creer Interiors.
peeps bunny bunting

Tuesday, March 23, 2010
Covered Decorative Books
.jpg) I have been looking for old books for my shelf at Goodwill for quite sometime and have not had much luck. I think I am going to change my whole focus and go with this cute project instead! I love how these books look. What's even better is you can personalize with colors that you like or that fit with your decor. Now when I go to Goodwill I can just grab any book and go from there. See the project here at Brown Paper Packages.
I have been looking for old books for my shelf at Goodwill for quite sometime and have not had much luck. I think I am going to change my whole focus and go with this cute project instead! I love how these books look. What's even better is you can personalize with colors that you like or that fit with your decor. Now when I go to Goodwill I can just grab any book and go from there. See the project here at Brown Paper Packages. Friday, March 19, 2010
yo yo yarn wreath
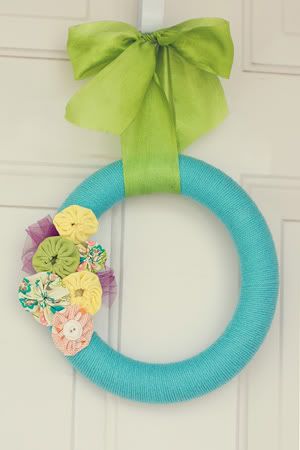
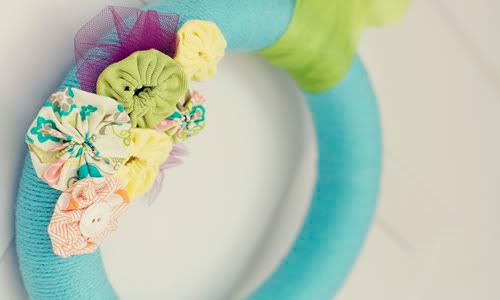 I wanted to add a little color to my front door so I made this fun and bright wreath.
 Supplies
wreath form
yarn
fabric
needle/thread
glue gun
ribbon for hanging
All that I did was wrap the yarn around the wreath form (purchased at the dollar store). Then I made a few fabric yo yo's (tutorial found at Hello My Name is Heather), hot glued them to the wreath, tied my ribbon up top and hung on my door. So easy and I had all the materials on hand except for the wreath form. I guess you could say this project cost $1.00. Not to shabby.

Wednesday, March 17, 2010

little people
 These would be perfect to add to my daughters collection of figurine toys. She plays with little figurines for hours and would love any new additions. Especially some that were made by mommy. Check them out at Shannon Makes Stuff.
vintage art...
 ...using nail polish remover. This is very cool! Can't wait to give it a try. Check it out at Twice Remembered.
Tuesday, March 16, 2010
st. patty's cupcake toppers
 I had to get this posted before the big day tomorrow. Maybe this will help with all of the St. Patty's festivities. Check it out at The TomKat Studio.
sticker book
 What a great idea to keep that love of sticking the stickers alive :) Check it out at Samster Mommy.
Monday, March 15, 2010
Family Values Canvas
 I saw this project on Brown Paper Packages and knew that it would be a fun and very cute way to remind my children of some of our family values. I love all the different paper that she used and all the different fonts! See the cute project here.
Friday, March 12, 2010
burlap wreath tutorial
 Of course we all know that burlap is all the rage, but I personally have never used it. I clicked on my moms blog and saw a super easy tutorial that she had done for a St. Patty's Day wreath. She is so crafty! I never realized how incredibly easy one of these burlap wreaths were. I can't wait to whip one up of my own. Check out my cute moms blog for this tutorial and lots of other fun projects at It's Just So Fabulous.
shabby chic banner

So cute and so easy!! I wonder if this same idea could work using coffee filters instead of crepe paper. Check it out at Tatertots and Jello from {a.e. filkins}.
Thursday, March 11, 2010
chalkboard containers
 One year, after Christmas, my mother-in-law gave me like 20 Christmas containers. It has since become a joke between my husband and I and his parents that they unloaded all of their junk on us that Christmas. We always laugh about it...well...maybe when my husbands sees these he will understand that anything can be turned into something great. Check out this idea at Someday Crafts.
Wednesday, March 10, 2010
palette daybed
 This is beautiful! Not only the great idea with the palettes but the beautiful colors throughout the room. This pictures gets me inspired and I love that. Check it out at Whip Up.
Monday, March 8, 2010
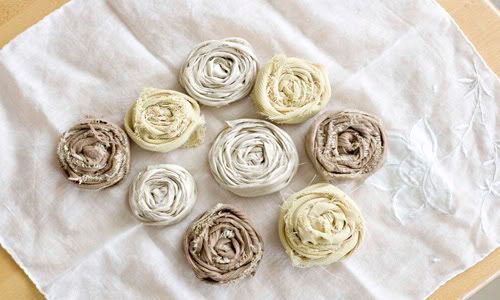
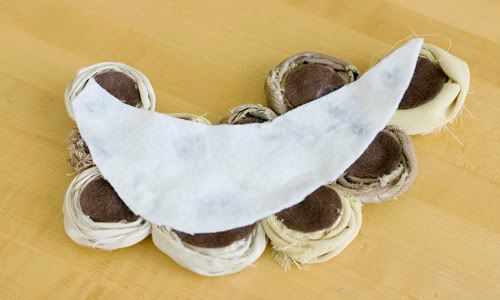
rolled fabric flower bib necklace
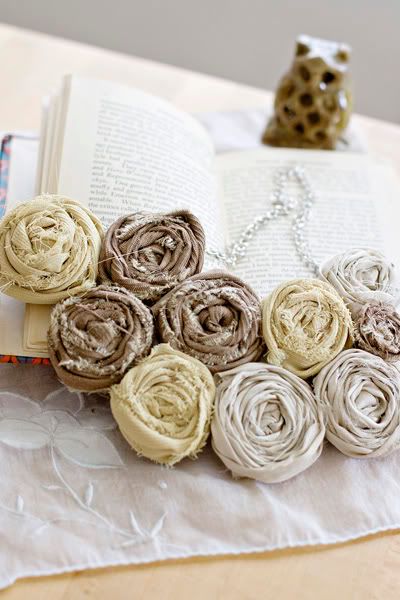 I have wanted to make a necklace like this forever and finally got the chance this last week. I tried to put together a tutorial that will hopefully to helpful to anyone else interested in these pretty little beauties.
Supplies:
fabric strips
felt
glue gun
necklace chain
First step is to roll all of your fabric flowers. I used this tutorial found at made by the mama monster.
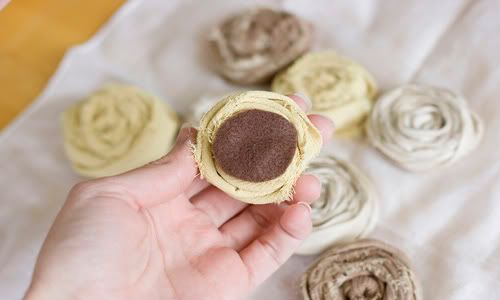
Next, cut felt circles and hot glue them to the back of each fabric rose to give it more sturdiness.

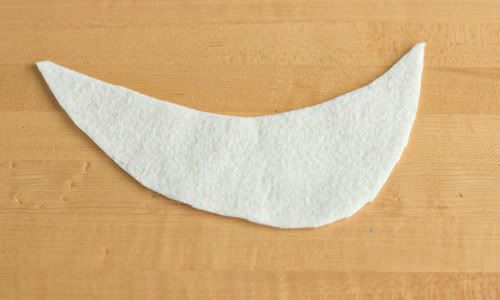
Cut a cresent shape out of your felt which will be used as your base for your fabric flower necklace.


Pretty necklace that will make you feel oh so beautiful.

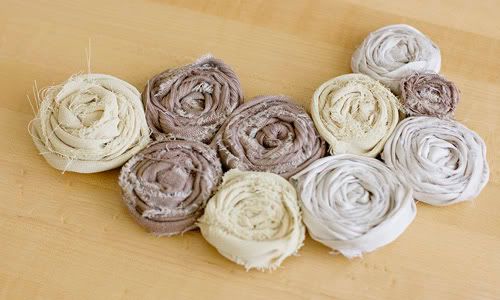
Arrange your flowers on the felt to create a pattern that is desirable to you.
Take your glue gun and glue down all of your flowers to the base piece of felt.
The back will look something like this. Not perfectly beautiful but no one is looking at this side.
Lastly, take your piece of necklace chain and hot glue to the back. Then glue a felt circle over the chain to hold in even more securely in place. Make sure that the chain is long enough so that the necklace can fit over your head.

Pretty necklace that will make you feel oh so beautiful.

Thursday, March 4, 2010
eat up
 I love this sign! I mean, hello, what else do we do in our kitchen...EAT! Well, we also clean, but I'd rather be reminded of the eating part. Check it out at Lolly Jane Boutique.
cookie dough truffle
 These look delicious and are right up my alley. Who doesn't love cookie dough and then dipped in chocolate. Thank you! Check them out at Be Different...Act Normal.
Wednesday, March 3, 2010

DIY candlesticks
 Love the candlesticks made by the ladies from Drab to Fab. I could seriously make a set of these for every room in the house. Check them out at Drab to Fab.
Subscribe to:
Comments (Atom)


